Installation and Maintenance Manual Replacement Driver Assembly in Post Top Fixtures (LED)
Warning
Read these instructions carefully before attempting to install or maintain this product. Work must be done by qualified personnel. Improper installation or maintenance may result in personal injury or death or significant property damage.
Installation Warning
Be certain that all electrical power is disconnected from the fixture before installing or maintaining the fixture. Failure to do so may result in personal injury or death.
Caution
Supply conductors that are run through the inside of a pole shall be supported by means capable of preventing injury and strain on the conductors.
Questions
If additional information is required, please contact:
King Luminaire Co. Inc. Customer Service Department 1-800-268-7809 scgrp.com
Instructions for Post Top Driver Assembly Replacement
- Make sure power is disconnected from the fixture.
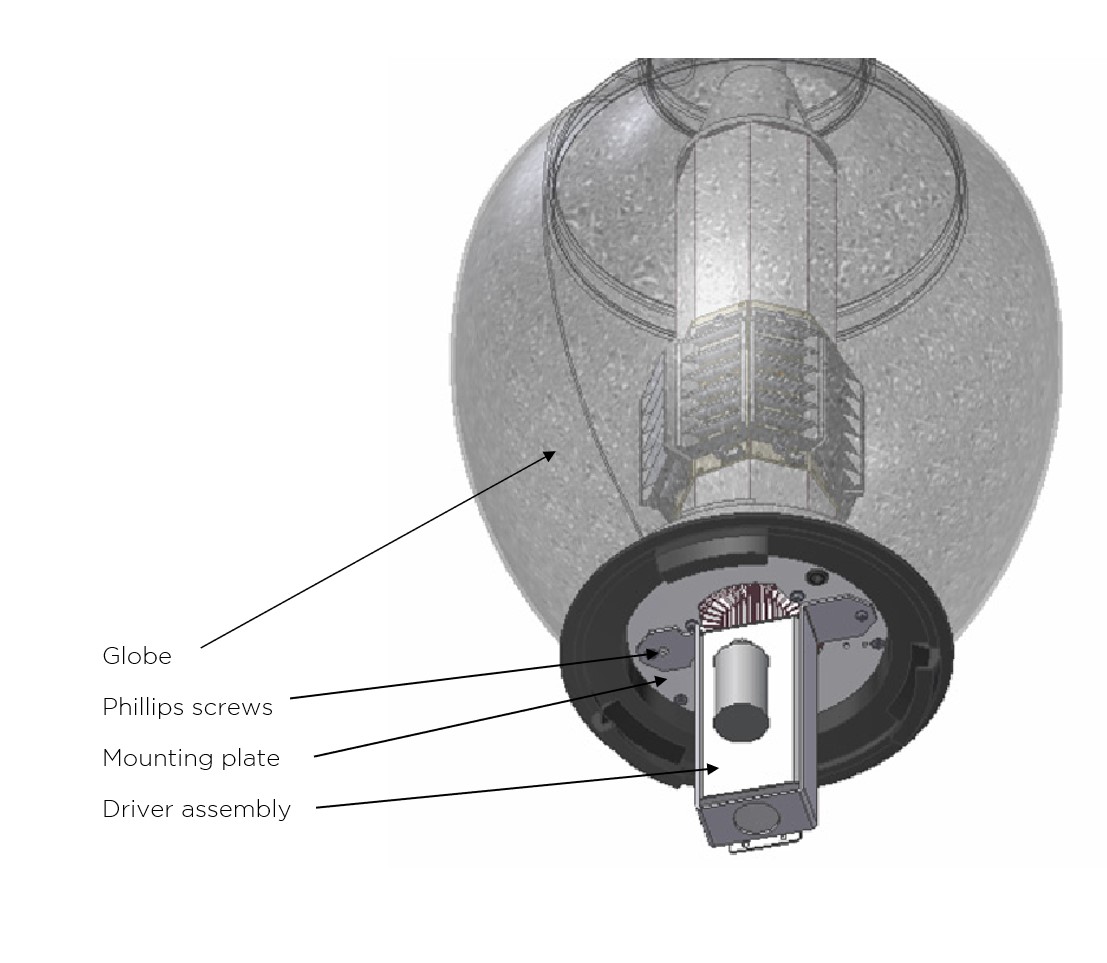
- Rotate globe counter-clockwise to release it and then lift it. By doing so driver assembly which is attached to bottom of globe will be accessible.
- Disconnect all the electrical connections of driver assembly from fixture.


- Unscrew the two Philips head screws that fasten driver assembly to mounting plate and remove driver assembly.
- Place new driver assembly in place of old one and screw it down with Philips head screws. Attach electrical connections.
- Place back globe on the fixture and rotate clockwise to lock the globe.
